How to Jewelry Wire Wrapping
Struggling to get started with jewelry wire wrapping? You’re not alone. Many people find it tricky to choose the right wire and master the techniques needed to create beautiful, secure designs.
If you’ve ever felt frustrated by tangled wire or loose beads, this guide will help you overcome those common challenges with ease.
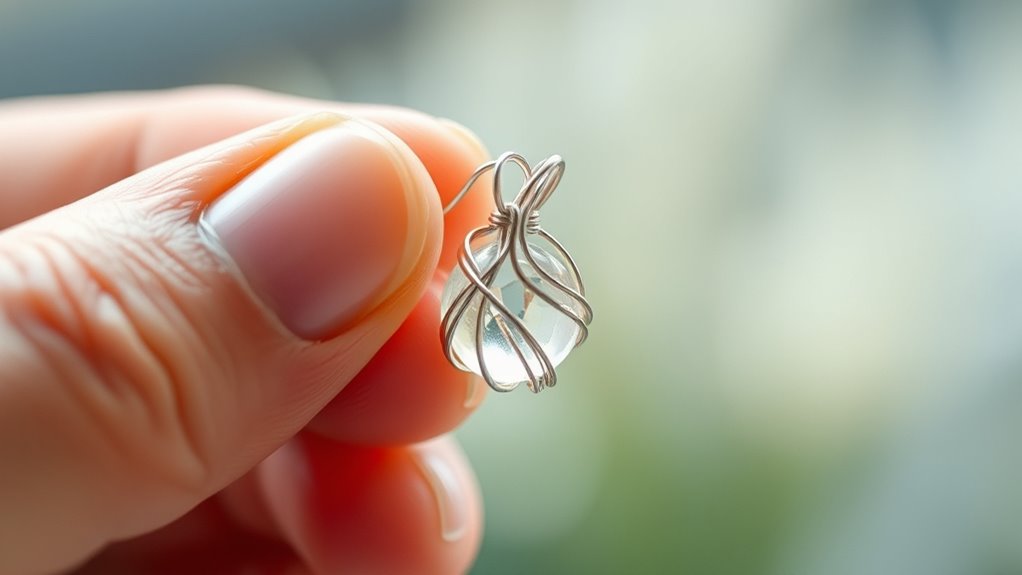
To start jewelry wire wrapping, choose the right wire, like copper, silver, or gold, considering flexibility and gauge for your design. Use basic tools like round-nose pliers to shape loops and coils, securing stones or beads tightly.
Focus on neat finishes by tucking and trimming wire ends to prevent unraveling.
Master simple shapes and secure your pieces well to create elegant, durable designs.
As you delve into wire wrapping, you’ll uncover tips to personalize and perfect your wire-wrapped creations.
Key Takeaways
- Start by mastering basic wire shapes like loops and spirals using round-nose pliers. This helps create secure and decorative wire wrapping.
- Choose appropriate wire materials such as copper, silver, or gold. Consider flexibility, durability, and the finish you want.
- Select the right wire gauge. Use thinner wires for delicate wrapping and thicker wires when you need structural support.
- Secure wire ends by tucking, trimming, and smoothing them. This prevents unraveling and makes your piece comfortable to wear.
- Incorporate beads or stones by planning their placement carefully. Wrap wire tightly using prong or bezel techniques to keep everything stable.
What Jewelry Wire Wrapping Is And Why You’ll Love It
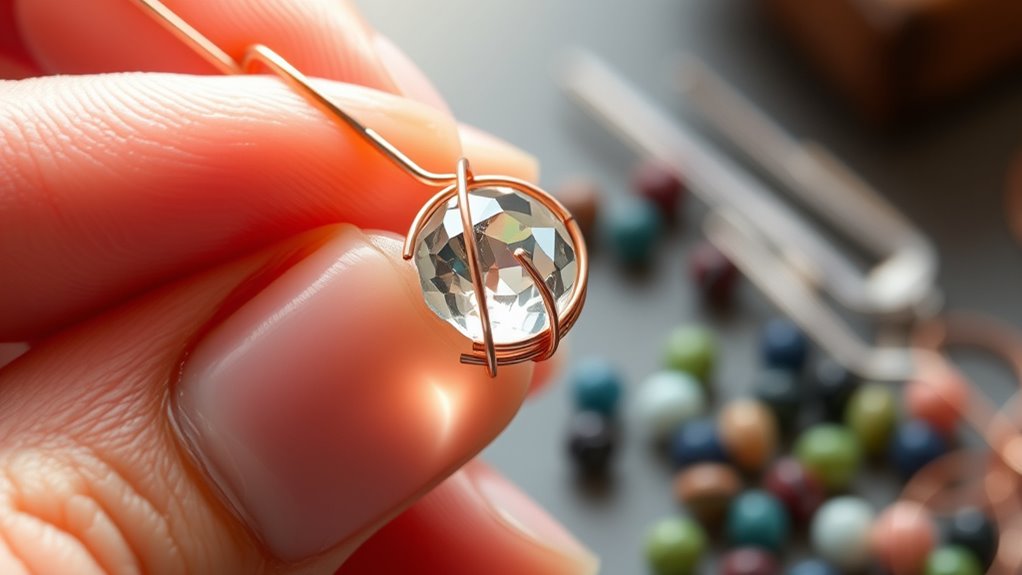
Although jewelry wire wrapping might seem complex at first, you’ll quickly find it’s a rewarding and creative way to make unique pieces. This technique involves twisting and shaping wire to secure stones or beads, allowing you to investigate endless color combinations that reflect your personal style.
You’ll appreciate how wire wrapping connects you to centuries of craftsmanship, embracing its historical significance that dates back to ancient civilizations. As you practice, you’ll develop an eye for detail and design, transforming simple materials into elegant accessories.
Wire wrapping offers both artistic freedom and a hands-on experience, making it perfect for anyone enthusiastic to craft meaningful jewelry that stands out. Once you get the hang of it, you’ll love how each piece becomes a reflection of your creativity and heritage.
Which Types Of Wire Work Best For Jewelry Wire Wrapping
When you’re picking wire for your jewelry wire wrapping, it’s good to consider a few things like the material, gauge, and how flexible it is. Different metals—like copper, silver, and gold—each bring their own unique look and strength to your piece. Plus, the wire gauge plays a big role in how easy it is to shape and how well your design holds up.
You’ll also want to think about the coating on the wire. It’s important because it affects the durability of your jewelry and how comfortable it feels when you wear it. So, keeping these factors in mind can really help you choose the best wire for your project.
Common Wire Materials
Since the success of your jewelry wire wrapping depends largely on the wire you choose, it’s important to understand the common materials used. Copper, silver, gold, and brass are popular choices, each bringing unique qualities and appeal.
Copper is affordable and flexible, often favored in fashion trends for its warm tone. Silver offers a classic look with historical significance, used in traditional jewelry for centuries. Gold, while pricier, adds luxury and durability, making your pieces stand out.
Brass provides a vintage vibe, popular in both contemporary and retro designs. When selecting wire material, consider not only aesthetics but also how the wire behaves during wrapping. Its softness, strength, and tarnish resistance all affect your final creation’s quality and longevity.
Wire Gauge Importance
Choosing the right wire gauge plays a crucial role in your jewelry wire wrapping projects because it affects both the look and functionality of your pieces. Wire gauge refers to the wire thickness, and selecting the appropriate size ensures your design holds securely and looks professional.
Thinner wires, usually between 26 and 28 gauge, are flexible and perfect for intricate wrapping and delicate details. Thicker wires, like 16 to 20 gauge, provide strength and structure, ideal for frames or clasps.
Using wire that’s too thin may cause your piece to lose shape, while wire that’s too thick can be hard to manipulate and might damage your tools. By understanding wire gauge and choosing the right wire thickness, you’ll create durable, beautiful jewelry with ease.
Coating and Flexibility
Although selecting the right wire gauge is essential, understanding the wire’s coating and flexibility can make or break your jewelry wire wrapping experience. Coating durability protects your wire from tarnish and wear, while flexibility benefits ease of shaping and reduces breakage.
Choosing wires with a strong coating guarantees lasting beauty. Softer, more flexible wires let you create intricate designs without snapping.
| Wire Type | Coating Durability | Flexibility Benefits |
|---|---|---|
| Copper | Moderate; may tarnish | High; easy to shape |
| Sterling Silver | High; tarnish-resistant | Medium; balances strength |
| Gold-filled | Excellent; long-lasting | Low; holds shape firmly |
Pick based on your project needs and desired wire longevity for the best results.
Essential Tools For Jewelry Wire Wrapping Beginners
To get started with jewelry wire wrapping, you’ll need a few basic tools like round-nose pliers, wire cutters, and flat-nose pliers. These are the essentials that will help you shape and cut your wire with ease.
Choosing the right wire type is just as important because it affects how your designs hold up over time. Different wires have different levels of flexibility and strength, so picking the right one can make your projects much easier and more successful.
Basic Wire Wrapping Tools
When you start wire wrapping jewelry, having the right tools makes all the difference in your ease and results. You’ll need round-nose pliers for creating loops and curves, flat-nose pliers for gripping and bending wire, and wire cutters to trim your pieces cleanly.
These basic tools help you replicate historical techniques with precision, connecting traditional craftsmanship to your modern designs. Tweezers or a small file can also assist in refining details.
As you experiment, pay attention to how different color combinations of wire complement your stones and beads, enhancing your creations. Investing in quality tools ensures better control and cleaner finishes, letting your skills shine through every wrapped piece.
With the right setup, you’ll find wire wrapping both enjoyable and rewarding.
Choosing Wire Types
How do you pick the right wire for your jewelry projects? Start by considering wire thickness, which affects flexibility and strength. Thinner wires (28-30 gauge) are perfect for delicate details and wrapping, while thicker wires (18-22 gauge) provide structure and durability.
Next, think about wire color. Choose from classic silver, warm copper, or bright gold tones to complement your design style and materials. Remember, some wires come coated or plated, affecting appearance and wear over time.
Also, decide between hard, half-hard, or dead soft wire based on how much shaping or bending your piece requires. By paying attention to wire thickness and wire color, you’ll create beautiful, lasting jewelry that matches your vision and skill level.
Getting Your Wire Ready For Wrapping
Before you start wrapping, you’ll want to prepare your wire carefully to guarantee smooth, clean results. Begin by cutting your wire to the appropriate length, considering extra material for bends and loops.
Straighten the wire gently using your fingers or a nylon jaw plier to remove any unwanted kinks or curves. This step ensures your wire bending is precise and effortless.
Next, choose the right tools: round-nose pliers for loops and chain-nose pliers for gripping and shaping. Clean your wire with a soft cloth to remove oils, which helps in achieving a polished finish.
Proper preparation sets a solid foundation for your jewelry design. It makes the wrapping process more enjoyable and professional-looking. Taking these steps will save you frustration later on.
Basic Wire Wrapping Techniques: Step-By-Step Guide
Now that you’ve got your wire ready, let’s talk about the essential tools you’ll need and the basic shapes you’ll want to form. You’ll also learn how to secure the wire ends so your design stays sturdy. These steps will give you a solid foundation for your wire wrapping projects.
Essential Tools Overview
Although wire wrapping might seem straightforward, having the right tools makes all the difference in achieving clean, professional results. You’ll want to start with a few essentials: round-nose pliers for creating loops, flat-nose pliers for gripping and bending, and wire cutters to cleanly trim your wire.
These tools help you replicate historical techniques that showcase the cultural significance of wire wrapping across different civilizations. Using proper tools not only improves your craftsmanship but also connects you to the rich tradition behind this art.
As you handle your wires with precision, keep in mind that these simple instruments empower you to create intricate designs that honor both ancient methods and modern creativity. Invest wisely, and your wire wrapping journey will be much smoother and more enjoyable.
Basic Wire Shapes
When you start shaping wire, mastering basic forms like loops, spirals, and bends gives you a solid foundation for more complex designs. Begin by practicing simple loops with round-nose pliers, then move on to spirals by carefully coiling the wire.
Bends help create geometric shapes that add structure and interest. As you experiment, think about how different color combinations of wire can improve your pieces, bringing vibrancy or subtlety depending on your style.
Use design inspiration from nature, architecture, or art to guide your shapes and create unique jewelry. Remember, these basic wire shapes are your building blocks. Once you feel comfortable crafting them, you’ll find it easier to develop intricate wire-wrapped jewelry that reflects your personal creativity.
Securing Wire Ends
How do you keep your wire designs secure and polished? Securing wire ends is essential to prevent unraveling and guarantee comfort when wearing your jewelry.
Start by carefully tucking the wire tips into the nearest coils or wraps, avoiding sharp edges that could scratch skin. Use round-nose pliers to gently bend and curl finishing wire tips, creating smooth loops or spirals that lock everything in place.
If needed, trim excess wire with flush cutters, then file any rough spots for a clean finish. This attention to detail not only strengthens your piece but also gives it a professional look.
How To Create Simple Wire Wrapped Rings And Pendants
If you want to create simple wire wrapped rings and pendants, you’ll find the process both enjoyable and accessible. Start by choosing wire gauges suitable for rings or pendants. Usually, 20 to 24 gauge works well.
Focus on clean, consistent pattern designs like spirals or simple coils to add visual interest without complexity. Experiment with color combinations by mixing different wire finishes, such as copper and silver, to create unique looks.
Begin shaping your wire around a ring mandrel or a pendant form, then secure the ends neatly. Keep your wire tension even to guarantee durability and a polished finish.
With practice, you’ll quickly master these fundamentals, allowing you to personalize your jewelry with creative patterns and appealing color mixes.
How To Add Beads And Stones To Wire Wrapped Jewelry
Adding beads and stones to your wire wrapped jewelry instantly improves its visual appeal and personal style. Start by planning your bead placement carefully. Consider symmetry and balance to highlight your design.
Use thinner gauge wire to thread beads securely. This allows you to position them exactly where you want.
For stone settings, wrap the wire tightly around the stone’s edges to create a secure frame without glue or solder. Experiment with different wire wrapping techniques like prong or bezel styles to hold stones firmly while showcasing their beauty.
Always check that beads and stones are snug and won’t shift during wear. Mastering bead placement and stone settings adds dimension and elegance to your wire wrapped pieces, making each creation unique and eye-catching.
How To Finish And Secure Your Wire Wrapped Jewelry
Once you’ve perfected your wire wrapping, securing the ends properly guarantees your jewelry stays intact and comfortable to wear. Wire wrapping history shows that craftsmen always emphasized neat finishes. This reflects the piece’s cultural significance.
To finish your work, tuck and trim excess wire, then use pliers to create tight loops or coils.
| Step | Tool Needed | Purpose |
|---|---|---|
| Trim ends | Wire cutters | Remove excess wire |
| Tuck ends | Flat-nose pliers | Prevent sharp edges |
| Create loops | Round-nose pliers | Secure beads and add design |
Wire Wrapping Mistakes To Avoid
Although wire wrapping can seem straightforward, you’ll encounter common mistakes that can weaken your piece or make it look unpolished. One key error is neglecting proper tension. If your wire is too loose, your design won’t hold, and too tight can break the wire.
Also, be mindful when mixing color combinations. Clashing hues can distract from your design’s elegance. Pay attention to cultural symbolism too; certain colors or patterns might carry meanings you don’t intend, so research before incorporating them.
Avoid uneven wraps and inconsistent spacing, as they reduce professionalism. Finally, don’t forget to trim and tuck wire ends securely to prevent snagging or injury. Steering clear of these pitfalls ensures your wire-wrapped jewelry looks polished and lasts longer.
Creative Tips To Personalize Your Wire Wrapped Jewelry
When you want your wire-wrapped jewelry to stand out, incorporating personal touches makes all the difference. Stay updated on fashion trends to choose colors and styles that resonate with your personality.
Smart material sourcing lets you pick distinctive wires, beads, and charms that tell your story. Experiment with shapes, textures, and finishes to make each piece one-of-a-kind.
Here’s a quick guide to spark your creativity:
| Tip | Description | Benefit |
|---|---|---|
| Mix metals | Combine copper, silver, or gold | Adds visual interest |
| Add meaningful charms | Use symbols or initials | Personalizes your design |
| Play with textures | Twist, hammer, or coil wire | Creates depth and dimension |
| Follow trends | Incorporate trendy colors/shapes | Keeps your work fashionable |
Use these tips to craft jewelry that’s one-of-a-kind!
Frequently Asked Questions
How Do I Clean and Maintain Wire Wrapped Jewelry?
To clean and maintain your wire wrapped jewelry, use gentle cleaning techniques like a soft cloth or mild soap with water to avoid damaging the wire. Avoid harsh chemicals that can tarnish or weaken the metal.
For maintenance tips, store your pieces in a dry, separate container to prevent scratches and tangling. Regularly inspect for loose wires or stones, and gently reshape any bent wires to keep your jewelry looking its best.
Can Wire Wrapping Be Combined With Other Jewelry-Making Techniques?
Absolutely, you can combine wire wrapping with alternative techniques! In fact, 65% of jewelry artists blend methods to create unique designs. By mixing wire wrapping with bead stringing, metal stamping, or resin work, you open up endless possibilities.
Experimenting with material combinations like leather cords, gemstones, or polymer clay can add texture and depth to your pieces. Don’t hesitate to merge techniques. It’ll make your jewelry stand out and showcase your creativity.
What Are the Best Storage Methods for Wire Wrapped Pieces?
The best storage solutions for your wire-wrapped pieces include using compartmentalized jewelry boxes or small zippered pouches to prevent tangling and damage. Clear plastic organizers help with easy visibility and quick access.
You should also consider soft fabric-lined trays or hanging organizers to keep your pieces separated. Employing these organization techniques keeps your jewelry neat, prevents scratches, and saves time when you want to wear or display your creations.
How Long Does It Typically Take to Master Wire Wrapping?
Oh, mastering wire wrapping overnight? Yeah, right! It usually takes months of dedicated technique progression and patience to really get the hang of it.
Don’t rush. Focus on consistent practice tips like starting with simple shapes and gradually challenging yourself. You’ll see your skills evolve faster if you set realistic goals and revisit tricky patterns regularly.
Are There Any Safety Tips for Working With Wire and Tools?
Yes, you should always wear safety gear like goggles to protect your eyes from flying wire ends. Gloves can help prevent cuts, but make sure they don’t reduce your grip.
Practice careful tool handling by keeping your workspace organized and using pliers and cutters properly to avoid slips. Always cut wire away from your body, and never rush your work.
Staying mindful of these tips keeps you safe while crafting.
Conclusion
Now that you’ve delved into the art of jewelry wire wrapping, you’re ready to create stunning pieces that showcase your unique style. Did you know that over 60% of handmade jewelry enthusiasts find wire wrapping the most satisfying technique?
With the right tools and a bit of practice, you’ll master the basics and avoid common mistakes. Keep experimenting with beads and personal touches to make your jewelry truly one-of-a-kind!
Remember, the key to beautiful designs lies in honing your skills and adding your flair through jewelry wire wrapping.